
If you enjoy this article, then get your own copy of the book “Where the Road Ends!”
Welcome to this month’s edition of “Where the Road Ends: A Guide to Trail Running,” where we talk about the basic backcountry skills new trail runners should have before they venture into remote terrain.
“Where the Road Ends” is the name of both this column and the book Meghan Hicks and Bryon Powell of iRunFar published in 2016. The book Where the Road Ends: A Guide to Trail Running is a how-to guide for trail running. We worked with publisher Human Kinetics to develop a book so anyone can get started, stay safe, and feel inspired on the trail.
The book teaches you how to negotiate technical trails, read a map, build your own training plan, understand the basics of what to drink and eat when you run, and so much more. This column aims to do the same by publishing sections from the book, as well as encouraging conversation in the comments section of each article.
In this article, we excerpt from Chapter 10 and lay out the three basic skills we think all trail runners should have for a safe backcountry experience:
- Navigating trails;
- Obtaining drinking water; and
- Knowing what to do if you get lost.
If you’re planning to take your trail running to the backcountry, places we define as roughly 10 miles (16 kilometers) or more from civilization, take with you this small but crucial set of skills to help you negotiate unplanned situations and problems.
Because of remote locations, challenging weather, or inexperience in negotiating problems when they arise, a small issue can quickly escalate into a dangerous situation. As we emphasize in this column each month, the best way to deal with a problem is to prevent it from happening in the first place through planning, having the right gear, and acquiring the appropriate skill set for the adventures you wish to tackle. We hope this article helps set you up for success!
Trail Navigation
Finding your way on singletrack seems downright simple. You just follow the trail, right? In many cases, that’s true. You show up at the trailhead and start running. The trail twists and turns but eventually ends up back where you started. In this case, you can negotiate the trail on intellectual autopilot.
The setup of some trail systems is not that simple. You may encounter unmarked trail intersections. Sometimes a trail fades out for a while. And sometimes bad weather can obscure your route even at close range.
In these cases, you’ll need to employ navigation skills. Navigation is often considered a difficult skill to master, but it’s pretty darn easy.
Reading a Map
The farther you get from civilization or the more remote the trail network is, the greater the chances that your trail will not have maps, signs, or other navigational aids. If you’re traveling into the backcountry, be ready for this reality and always carry a map.
Maps vary in layout, although most have a couple of features in common. First, trails and other prominent geographic features like roads, creeks, mountains, springs, and more are marked by symbols. For instance, a trail might be delineated as a dashed line.
Almost all maps are scaled, meaning that a certain distance on the map corresponds to a distance in real life. For example, one inch on the map might represent a mile (where 1 centimeter would represent 625 meters). Most maps have a due north symbol, and almost all maps have a key that describes the symbols.
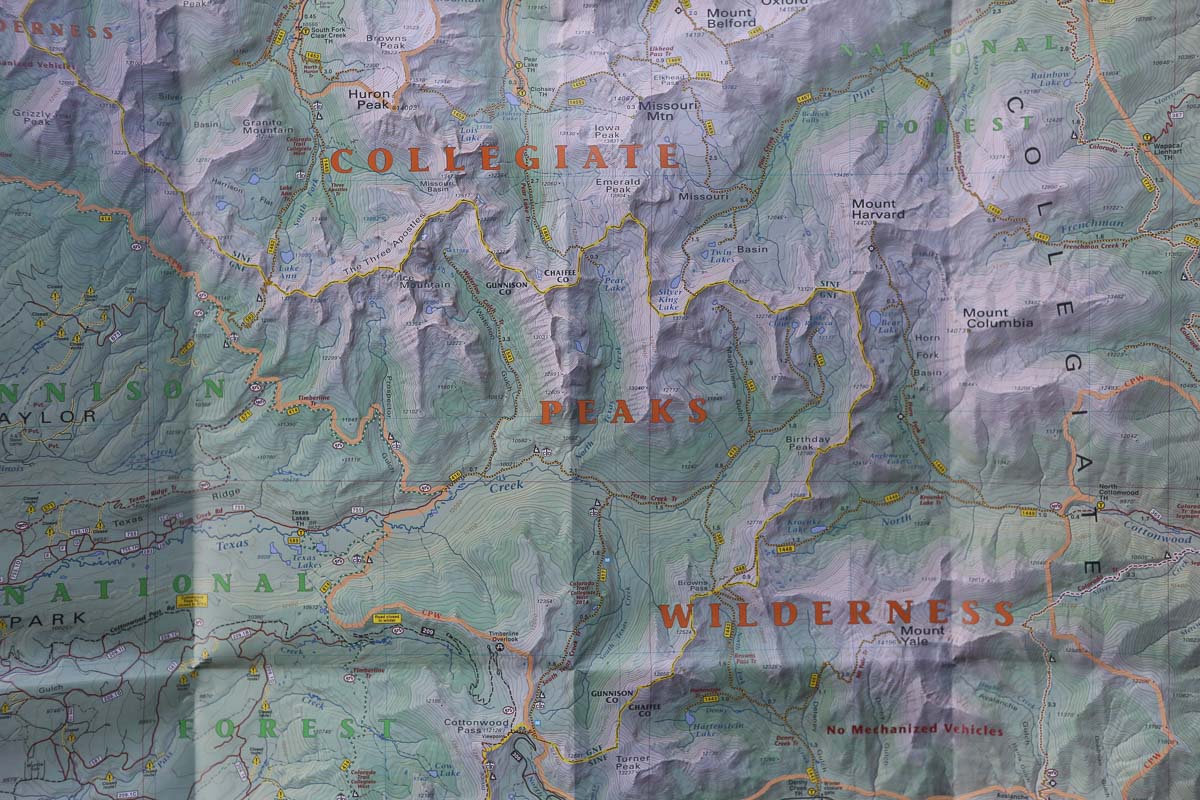
A topographical map of the Collegiate Peaks Wilderness of Colorado. Photo: Human Kinetics/Kirsten Kortebein
High-quality backcountry trail maps have topographic lines, which express the three-dimensional features of the landscape. Each line signifies a particular elevation with a specific amount of vertical change, such as 40, 100, or 200 feet, between each line. The key will tell you the amount of vertical change represented by the space between each line.
You will notice that the lines grow close together in some places and spread apart in others. Such areas on the map represent steeper and flatter terrain. Understanding the topographic lines on a map is like unlocking a secret code: You’ll be able to identify many smaller, real-life topographic nuances like mesas, ridgelines, gullies, and more.
Finally, some detailed backcountry maps contain other features that indicate variations in terrain, like shading to indicate steep slopes or dense vegetation.
Reading the Landscape
The landscape through which you’re running offers numerous navigation clues, too. In places where sparse vegetation allows long views, a keen observer can often pick up the trail itself far ahead. Or, if you know that a certain mountain or a river should be on your right as you’re running a trail, you can look for it before you get there.
All this said, the landscape of the earth is extremely complex, and you’ll commonly find yourself fooled by canyons not visible until you get close to them, ridges that ripple more times than you expect, and false summits.
In rare cases, weather can impair your view entirely, prevent you from seeing the trail just 10 or 20 feet ahead, and not allow you to read the landscape at all. When this happens, rely on a map, compass, or maybe a GPS device, as needed.
Using a Compass
You should carry a compass on any run into the backcountry and know how to use it.
Liza Howard, a champion trail runner and instructor for the Wilderness Medicine Institute and the National Outdoor Leadership School since 2003, humorously explains, “A compass can be an intimidating piece of equipment. Fortunately, the only part that’s tricky is compass vocabulary. Compasses themselves are entirely straightforward. A compass points north. That’s all it does. Your toaster and coffee maker are wildly more complicated. And once you know where north is, you can figure out all sorts of other things like what direction you’re heading, where you want to head, or where you are.”
You can use a compass in many ways, the most common being determining the direction you’re heading and triangulating your position in real life onto a map. We briefly explain these two uses.
To determine your direction of travel with a compass, point the arrow extending away from the compass dial itself in the direction you’re headed. Look at the compass dial and notice where the magnetic arrow inside it is pointing. This magnetized arrow always points toward magnetic north.
Taking care to keep the long arrow pointing toward your direction of travel and the whole compass itself flat (some compasses come with bubble balances to assist with this), rotate the compass dial until the arrow pointing toward magnetic north is between the two parallel lines inside the dial itself.
Read the number on the dial next to the small arrow pointing at the dial, which will be somewhere between 0 and 360 degrees. This number represents your direction of travel.
You can also use a compass to triangulate your position relative to three known geographic landmarks — high points, usually, that you can identify both on a map and in real life. Point the arrow extending away from the compass dial itself in the direction of the first landmark.
Follow the previous instructions to align the magnetic needle inside the dial’s parallel lines. The number on the dial represents the direction of your landmark relative to you.
Next, draw a line on a map representing your sightline to that landmark. For example, if you determine that a certain mountain is located 270 degrees relative to you, you would draw a line on a map representing your sightline to it, which would be 180 degrees opposite on a compass, or 90 degrees.
When you do that two more times, for two other landmarks, you will find that the three lines intersect at precisely one point on the map. That intersection is exactly where you are. If you have nothing to write with, place a piece of grass or a tiny twig on your map to represent each sightline.
By the way, a one-day orienteering class or compass-use course at your local outdoor store will help you master these two skills and many more.
Obtaining Drinkable Water
If you run in the backcountry enough, the time will come when you’ll need more water than you’ve carried, perhaps when it’s hotter than you expected, a run takes longer than you planned it to, or you accidentally spill your water. Therefore, you should always carry a means to treat water when you trail run in the backcountry.
The difficulty of locating water depends on the environment and climate through which you’re running. In a high alpine environment, small streams and cascades can be ubiquitous. In a desert, you’ll have to plan your water acquisition at the rare water access points. The best approach is to figure out the water-access points along your route in the planning process.
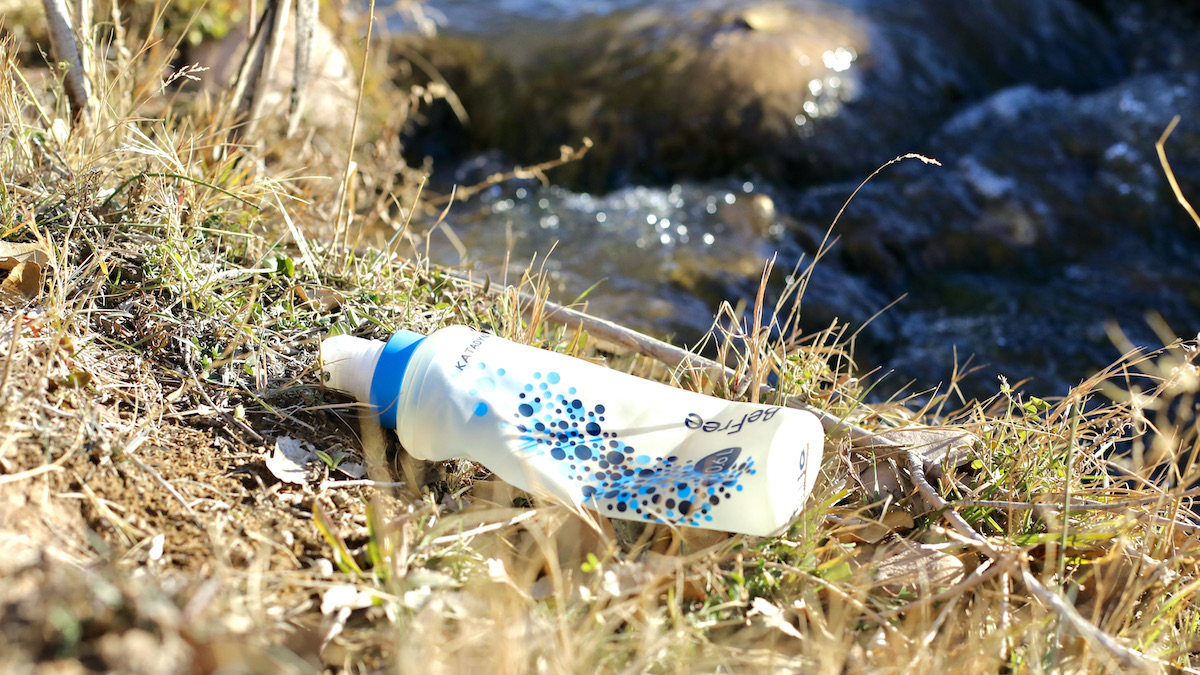
The Katadyn BeFree can help you filter water in the backcountry so you don’t have to carry it all with you. Photo: iRunFar/Meghan Hicks
In any environment, look for valleys, because water follows gravity on a downward path. The presence of deciduous trees and shrubs — cottonwoods, aspens, willows, and tamarisks, for example — is also an indicator of nearby water in many environments. Also, look for outcrops of solid rock, because water may collect in depressions.
The water you find may be safe to drink untreated, but it may also contain any number of bacteria, parasites, and other creatures that can make you sick. An array of water-treatment products are available that will ready your water for safe drinking.
Each water-treatment product has pros and cons relating to the speed with which the treatment process occurs, the effort you must put into treatment, the taste of the water after treatment, and the weight of the water-treatment product.
Try to acquire water from a moving body rather than a still one, like a creek as opposed to a pond, so that the water has presumably had less time to interact with the microscopic creatures that can sicken you. If signs indicate that your water source has recently been used by wildlife or livestock, move upstream from where they’ve used it.
Look for water with good clarity, because suspended sediment can clog a filter, block ultraviolet treatment, or add grit to water if you chemically purify it. In a pinch, you can use a piece of fabric to pre-strain cloudy water.
What to Do if You Get Lost
We hope you never need to use the information in this section, but knowing exactly what to do if you become lost can mean the difference between a mere misadventure and an unnecessary tragedy. Here’s how to save your own bacon.
Don’t Panic
“Take a deep breath. People get lost and then found a lot. The key when you’re lost is not to get more lost,” says Liza Howard.
If you do become highly emotional, stop everything and ride out those feelings. Literally, don’t move, make decisions, or do anything until your emotions settle and your rational side returns.
Stop Moving Forward
If you don’t know where you are, you most likely have even less of an idea of where you are headed.
Consider Retracing Your Steps
The goal here is to backtrack to the last place you knew where you were. Are your footprints visible in dirt, sand, or snow? Are you nearly 100% confident that you’ll recognize the features of the landscape that you passed through earlier? If so, carefully retrace your steps until you are again in familiar terrain.
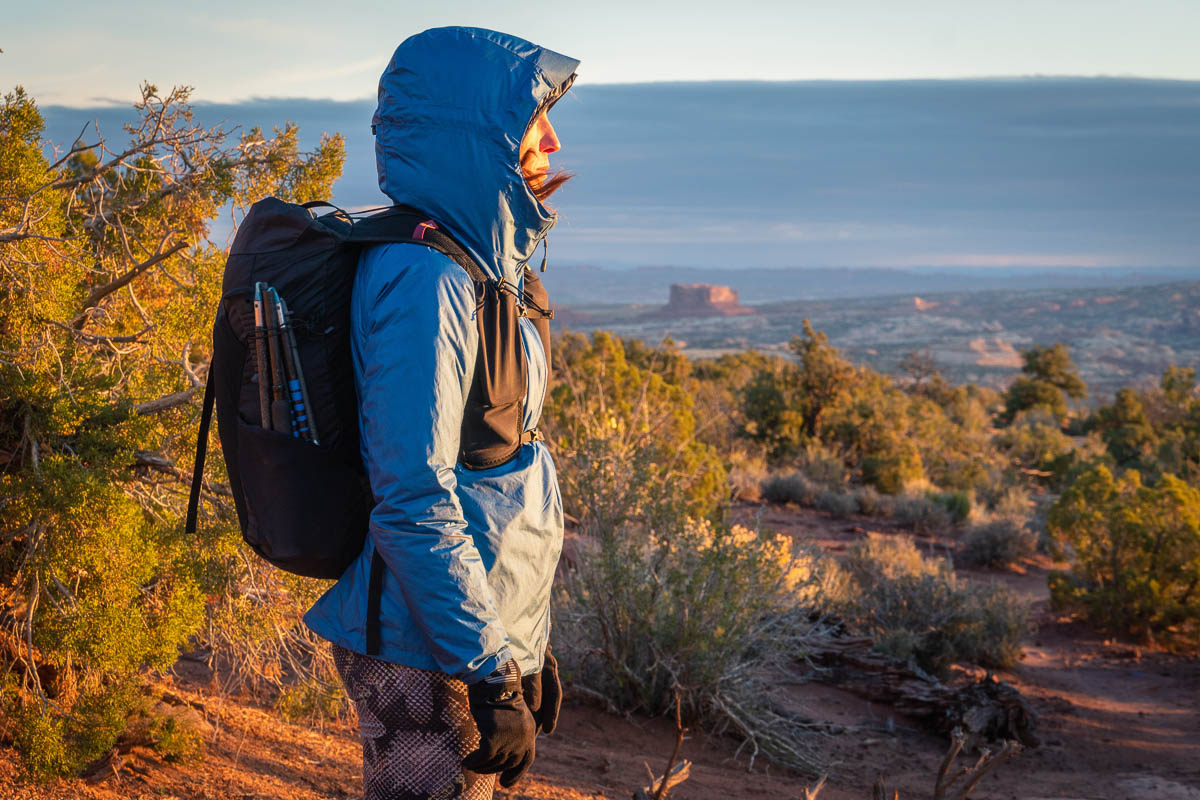
If you’re unsure of where you are, stop, think, and take steps to triangulate your location. Photo: iRunFar/Eszter Horanyi
Triangulate Your Location
If you have a map, compass, and a good view of the terrain, triangulate your location. After you have located yourself on the map, plan your way from there back to your intended route. Do so by retracing your steps instead of taking a new route. Use a compass to guide yourself back.
Don’t Take a Shortcut
Don’t leave the trail to cut cross-country in an effort to take a shortcut. Often, terrain deviations and difficulties aren’t fully visible, and the shortcut may not be one after all.
Also, if you will require rescue by professional search and rescue, they can more easily find you on a trail, even if it’s not the one you’re supposed to be on, than off-trail. The only exception to this is if you can see an unmistakable “handrail,” like a road, stream, or valley that you are familiar with.
Don’t Split Your Group
Two or more people working together are better than one. Pooling resources and working together is much easier and safer than splitting into smaller groups or going solo. The only exception to this rule is if a member of your group is incapacitated and unable to move.
Depending on the situation, you may have to leave someone alone so that you can get the needed emergency assistance.
Work Together as a Group
If you are part of a group, you can work together to create a search system of people looking for your last known location, but be certain to stay in voice or visual contact with each other. This method will allow your team to search a greater area than you could solo but keep you safely together.
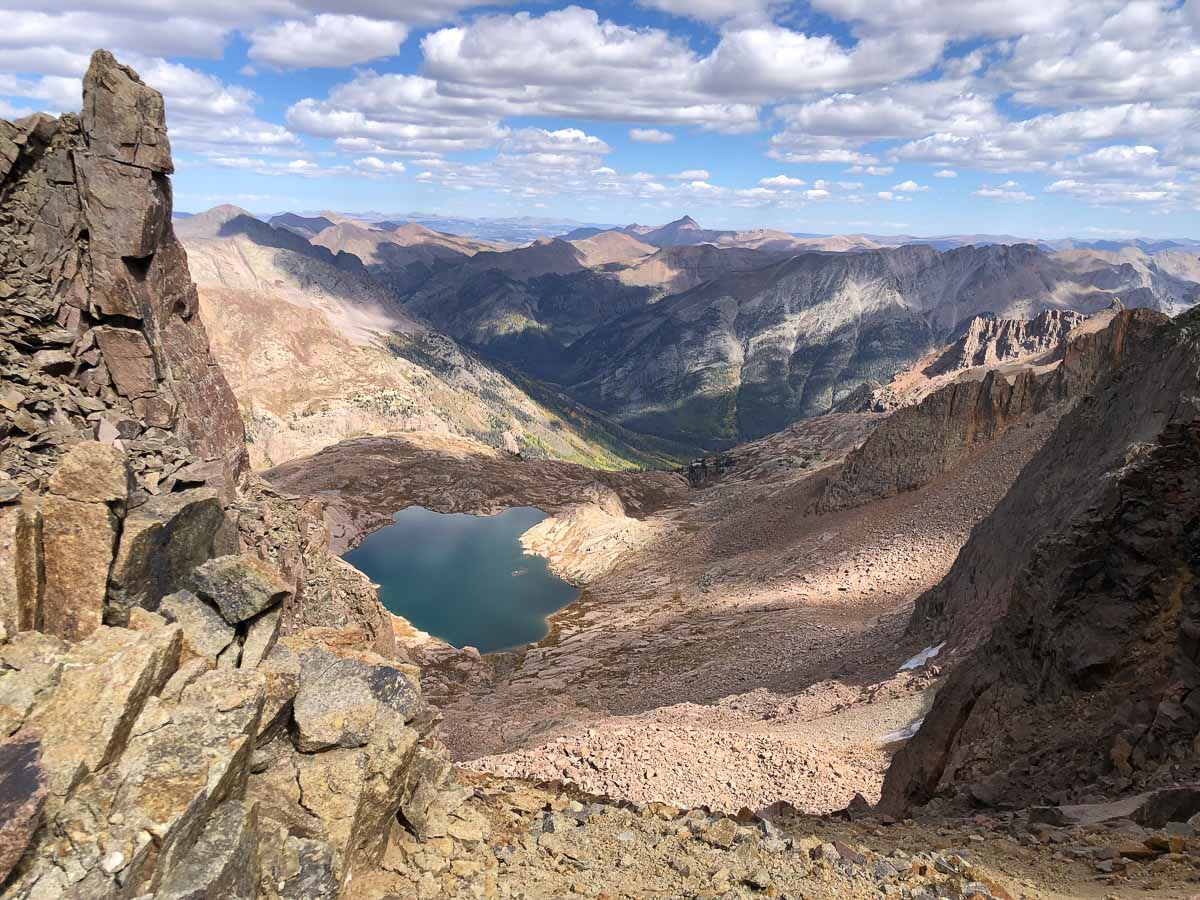
If you don’t know where you are, you surely don’t know where you’re going, so be sure to stop, think, and converse with the group, if you’re a part of one. Photo: iRunFar/Meghan Hicks
Take Note of Your Supplies
Survey your emergency provisions such as food, water, fire-making tools, clothing layers, light sources, first-aid supplies, communications technology (and their power supply), and more. Make a plan for rationing them.
Gather emergency provisions from nature, such as water, kindling and wood for a campfire, and dry leaves or pine boughs that can be placed inside your clothing for extra insulation.
Seek Professional Rescue Assistance
If you can’t resolve your situation independently, make appropriate outside contact with search and rescue (SAR) or a reliable person who can make such contact for you.
Relay crucial information on your last known location, the number of people in your group, the condition of the group, your survival provisions, and the landscape features around you.
Here’s what you need to know about the SAR process. If weather, time of day, and other risk factors allow, a SAR team first engages in a hasty search. A small, quickly assembled team goes out looking for you, by helicopter, foot, horse, or vehicle, shortly after they learn you are missing.
As a hasty search is being conducted, other SAR professionals make plans for a full-blown search effort, which generally begins near dawn of the first day after they receive a request for assistance.
If you are awaiting rescue, make sure you’re as visible as possible from the ground and air and that you’re away from loud noises like rushing water that can keep you from hearing searchers. A lot of running packs have tiny whistles built into them now — use your whistle.
Excerpted from Where the Road Ends: A Guide to Trail Running, by Meghan Hicks and Bryon Powell. Human Kinetics © 2016.
Call for Comments
- We hope this guide helps you feel safer and more confident in the backcountry. Share your backcountry running stories below!
